It may happen that you are missing some functionality for your robotic system, which is not present amongst the predefined components in the CogIMon Component Library (CCL). In such a case you may need to create your own components that contains the desired functionality. These instructions present the common way to create a CoSiMA-conform Orocos RTT component, which can then be used with the modelling tools.
$ git clone https://github.com/cogimon/rtt-component-template.git
The content look like this:
$ cd rtt-component-template && tree .
.
├── CMakeLists.txt
├── include
│   └── simple-rtt-component.hpp
├── ops
│   └── simple_example.ops
├── README.md
└── src
    └── simple-rtt-component.cpp
 #..[ omitted ]..

 #
 # This creates a standard cmake project. You may extend this file with
 # any cmake macro you see fit.
 #
 project(sample-rtt-component) #  <--- Change the name

 #..[ omitted ]..

 orocos_component(
   ${CMAKE_PROJECT_NAME}
   ${PROJECT_SOURCE_DIR}/include/simple-rtt-component.hpp #  <--- Change the name
   ${PROJECT_SOURCE_DIR}/src/simple-rtt-component.cpp #  <--- Change the name
 ) #  <--- you may add multiple source files

 #..[ omitted ]..
In .cpp / .hpp:
 #include "simple-rtt-component.hpp" //  <--- Change the name

 //..[ omitted ]..

 RttComponent::RttComponent(std::string const & name) : RTT::TaskContext(name) {} //  <--- Change the name

 //..[ omitted ]..

 // This macro, as you can see, creates the component. Every component should have this!
 ORO_CREATE_COMPONENT_LIBRARY()ORO_LIST_COMPONENT_TYPE(RttComponent) //  <--- Change the name
$ mkdir build && cd build
$ cmake -DCMAKE_INSTALL_PREFIX=<path-to-your-CoSiMA-installation> ..
$ make
$ tree orocos
orocos
└── gnulinux
 └── RttExamples  #  <--- Name of the component library
     └── libRttExamples-gnulinux.so  #  <--- Component library
$ source <path-to-your-CoSiMA-installation>/bin/setup-cogimon-env.sh
$ export RTT_COMPONENT_PATH=$RTT_COMPONENT_PATH:<path-to-your-component-librarys-build-folder>/orocos
 $ deployer-gnulinux
 Real-time memory: 517904 bytes free of 524288 allocated.
    Switched to : Deployer

   This console reader allows you to browse and manipulate TaskContexts.
   You can type in an operation, expression, create or change variables.
   (type 'help' for instructions and 'ls' for context info)

     TAB completion and HISTORY is available ('bash' like)

     Use 'Ctrl-D' or type 'quit' to exit this program.

 Deployer [S]> import("RttExamples") #  <--- Name of the component library
  = true

 Deployer [S]> displayComponentTypes
 I can create the following component types:
    OCL::ConsoleReporting
    OCL::FileReporting
    OCL::HMIConsoleOutput
    OCL::HelloWorld
    OCL::NetcdfReporting
    OCL::TcpReporting
    OCL::TimerComponent
    OCL::logging::Appender
    OCL::logging::FileAppender
    OCL::logging::GenerationalFileAppender
    OCL::logging::LoggingService
    OCL::logging::OstreamAppender
    OCL::logging::RollingFileAppender
    TaskContext
    RttComponent #  <--- Name of a component from the library
  = (void)

 Deployer [S]> loadComponent("name-component-inst", "RttComponent") #  <--- Name of a component from the library
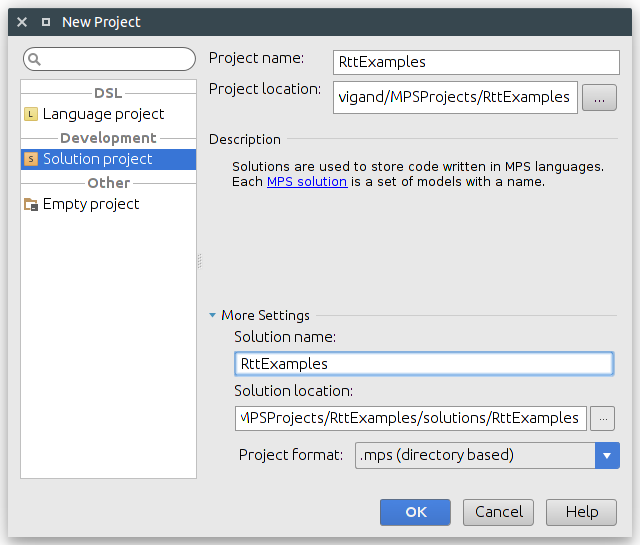
Start the CoSiMA IDE and create a new project solution.
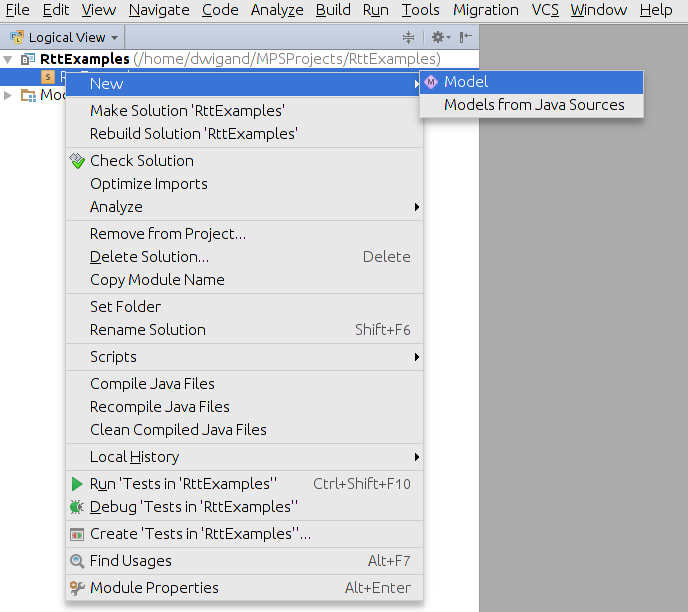
Create a new model and name it ccl.
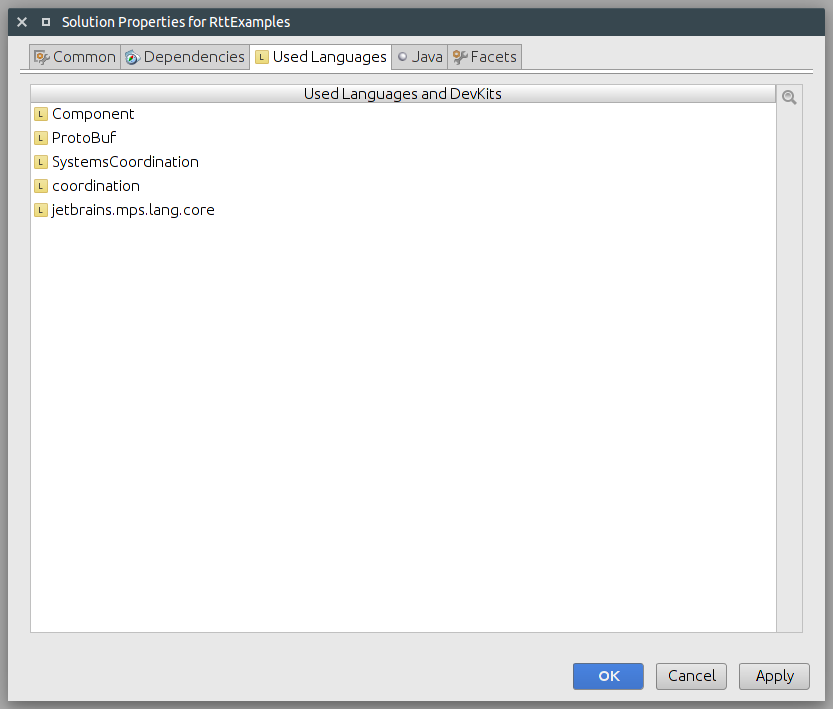
Include the following dependencies.
Create a new component in the model.
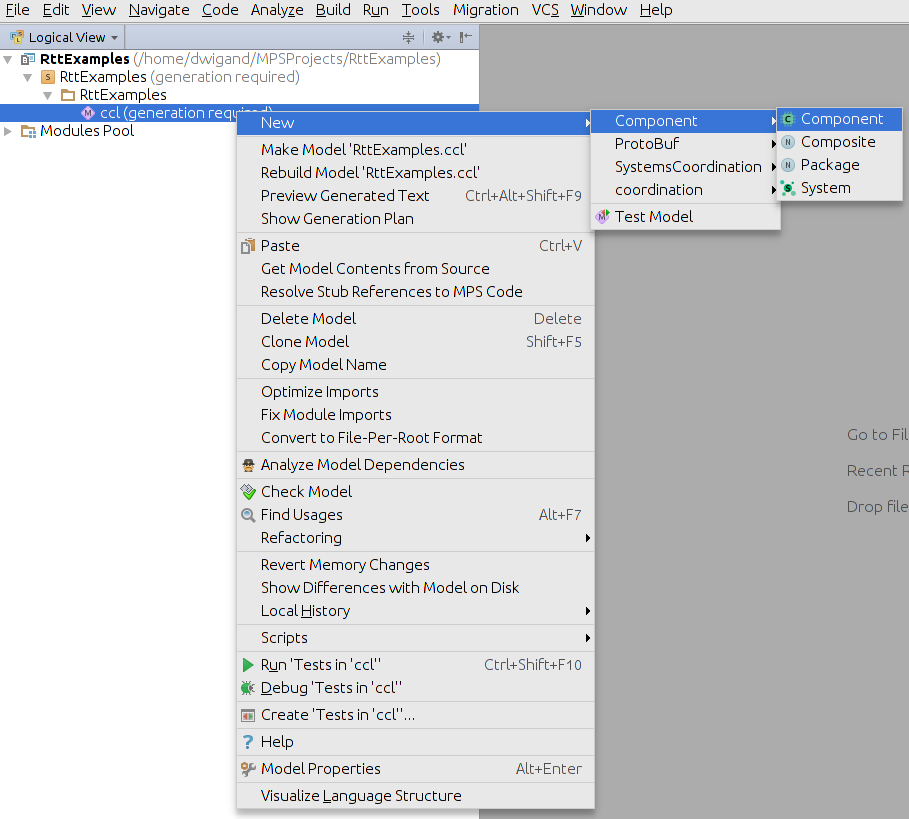
Represent the component as it is in the c++ implementation.

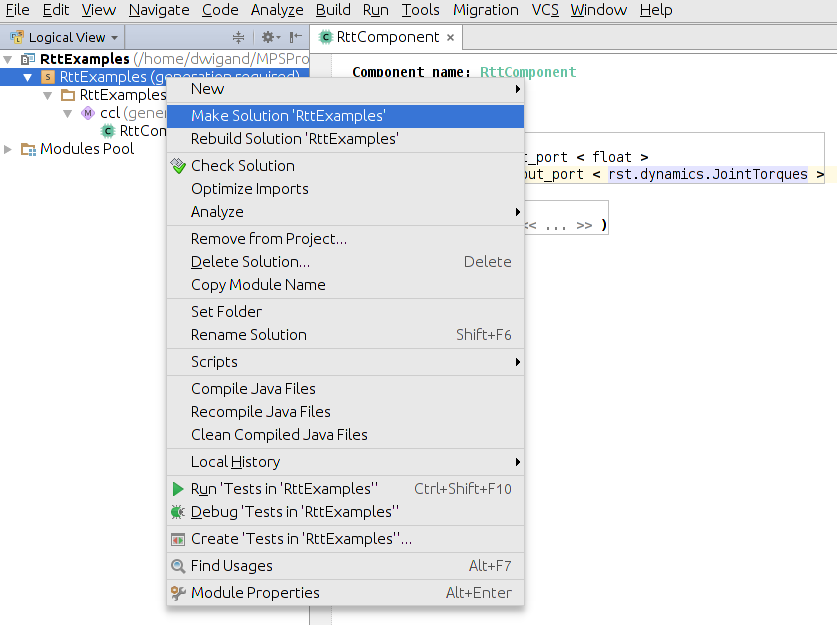
Compile the project solution.
DO group components with high cohesion together!